After learning how to play the guitar by ear the old way. The way every musician who knows how to play it by ear does. I stumbled on a new way, how to play the guitar by ear. And it works on ANY song. It’s exciting! And I’ll tell you how to do it.
In order to learn the guitar by ear, the new way, we’re going to have to learn this first, and it’s somethings you already know, if you’re not a beginner. But if you are a beginner, I got you covered, cause I’ll tell you how to do them.
Do These Things First
I’ll make this list of what to do for beginners here first, that way if you’re NOT a beginner, you can just skip over this section.
First: Learn your Barre Chords first because this will make it REAL easy for you when you do. Because you won’t be struggling of knowing where the frets are on the guitar as much.
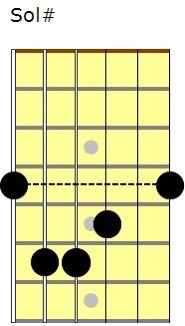
Because ALL you gotta do is just point your index finger on the guitar fretboard as a point of reference, letting you know what fret you’re on.
You will understand what I’m talking about when you watch a couple of YouTube videos on the subject. Just type in: “How To Learn Barre Chords.” And you’ll be on your way to playing them.
Second: Now learn the numbers on the guitar fretboard, also called the guitar fingerboard, meaning learn where the 1st fret is, the 2nd fret, the third fret and all the way up to the 24th fret, as shown below.
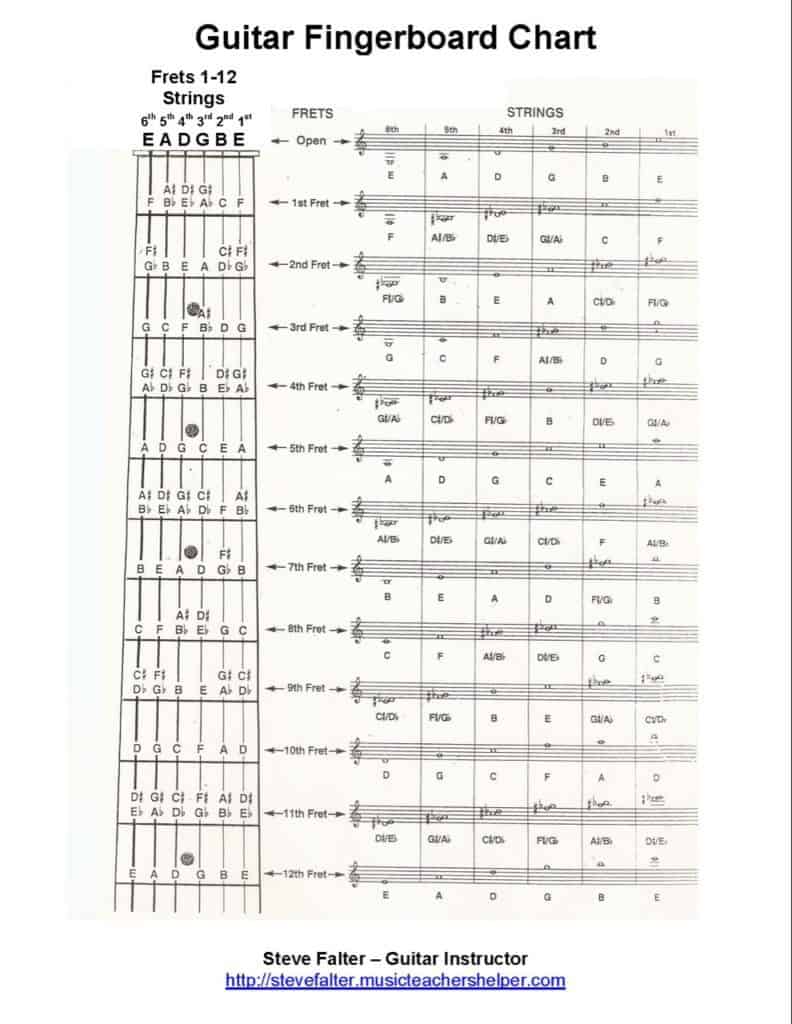
BELIEVE ME! It’s not that hard to do. It just sounds hard to do because of ALL those fret numbers. NOTE: What will help you tremendously is if you follow those notes on top of your guitar.
One dot is on the THIRD FRET. The other dot is on the FIFTH FRET the other dots are on the SEVENTH FRET, NINTH FRET and the TWELFTH FRET, FIFTEENTH FRET, SEVENTEENTH FRET, NINETEENTH FRET, and the TWENTY FIRST FRET. Yes again it seems like a lot, but once you get it, and learn this, it WILL be EASY.
THEN, what I just told you, about the numbers on the fretboard, I want you to learn the ALL the LETTERS on the fretboard. BUT ONLY on the 6th and 5th strings. So the 6th string, 1st fret, it will be F, the 6th string, 3rd fret it will be G, the 6th string, 5th fret will be A and so on and so forth.
Then on the 5th string it will be: Yes the 5th string, 1st fret, it will be A# fret and the 5th string, 3rd fret, it will be C and on the 5th string, 5th fret, it will be D and all of the rest of the LETTERS that you need to learn.
NOTE: PLAY THESE LETTERS WITH BARRE CHORDS. AND AS YOU NAME THE LETTERS, THAT WILL BE THE NAME OF THE CHORD, WHERE YOUR INDEX FINGER IS:……

Example: Find the F letter. And that will be the F chord. Find the D letter, and that will be the D chord etc. Do this with ALL the letters. And it will give you the chords. This will make learning the letters and barre chords more easier to play and more fun to play. When you watch a couple of videos on YouTube, you’ll see what I mean.
So type into YouTube: “How To Learn The Fretboard with Barre Chords.” and you’ll get yourself to learning it real quick.

Third: Now you need to learn Open Chords. Don’t go learn no weird, twisted chords. Only the standard ones, like A, B, C, D, E, F, and G.
And then your minors ones which are Am, Bm, Cm, Dm, Em, Fm, Gm. That’s all……
Don’t get your fingers all in a bunch trying to learn ALL the open chords. You never will any way, cause there’s too much. If you want to be technical about it. AND you’ll rip your hair out, and NEVER go back to learning the guitar ever again.
Believe me I seen people throw there hands up because they tried to learn ALL of them, don’t let that be you. Just learn only 14 of them. How bout that for easy.
If you don’t know how to play open chords, then go find a good website that shows them, and practice doing them. These can be found by typing into Google: “Open Chords Charts.”
And then find the websites that tell you how to play them, by typing into Google: “How To Play Open Chords.” Find a good one or two websites and master them, till you get good.
Finally: You must learn the Busker Technique. The Busker Technique is ACTUALLY the way the PROS play it. It’s actually called “Rock Chords” by the pros, in the rock world. Yes this is one of the best kept secrets among them.
MOST people don’t even know this. You would think that after ALL this internet knowledge that we have now a days, that more people would know this, but they don’t.
If you don’t believe me go up to any Guitar player on the street and ask them to play the Rock Chord way and they will say “HUH?” They don’t know.
AND to have EVEN more fun with them, ask them, do they know how to play the Busker Technique? And see what kind of strange look they will give you. But anyway, learn this way. It is so FUN and easy. You may never want to stop playing it this way, for a long time. I warned you.
To learn this way, the Busker Technique or the Rock Chords way it will be on YouTube, you will only find it there, or just click on the video below to watch it now: “Learn To Play Guitar The Fastest Way – The Busker Technique 1”
Now All We Gotta Do Is This
NOW, all we gotta do is this…… to non beginners this will be real easy. To beginners this will be a little difficult, but doable. We just have to play D chords.
That sounds easy, but you’re gonna have to play ALL the D chords, on the guitar. There are 5 of them on the guitar. I’m gonna show you where they are. And what to do with them.
I’ll make it real easy on you. And we’ll start at the open chord area. And then work our way up the neck.
First, we’ll play a open D chord. Which you know is at the 2nd and 3rd fret area, because you watched the videos already, on different websites. Let’s keep this simple.

Ok now we are gonna work our way up the neck, and play the D chord at the 5th fret area, on the 5th string. Play it with a barre chord, of course.
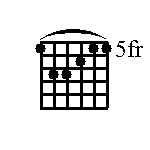
Now play the D chord at the 10th fret area, on the 6th string. Play this with a barre chord also.
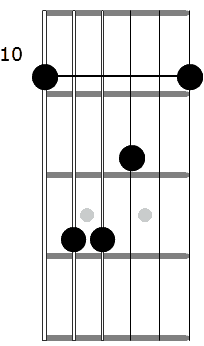
And finally play the D chord at the 17th fret area, on the 5th string. And play this as a barre chord.

Wait a second I thought there was 5 of them, there are 5 of them. And the 5th one is at the 22nd fret on the 6th string. I’m gonna leave that out cause, it’s hard to play that high up the neck. (But not for me it’s hard, but for you it may be hard) especially on the acoustic guitar.
If you’re playing a electric guitar, it’s easier. If you want to play it there at the 22nd fret, go ahead, it will still work for this lesson. But I’ll keep it to the 17th fret.
Now When You Get Good
Now when you get good at all that I taught you so far, if you’re not a beginner, you already know all this……
But both beginners and non beginners, I’m gonna need you to bounce around the neck of the guitar. What I mean by this is, I want you to play up and down the neck of the guitar with Barre chords and ONLY at the D chord areas.
ALL 4 areas of them at the 5th fret, the 10th fret and the 17th fret areas. And at the open chord area, where the Open D chord is, play that too, as an Open D chord.
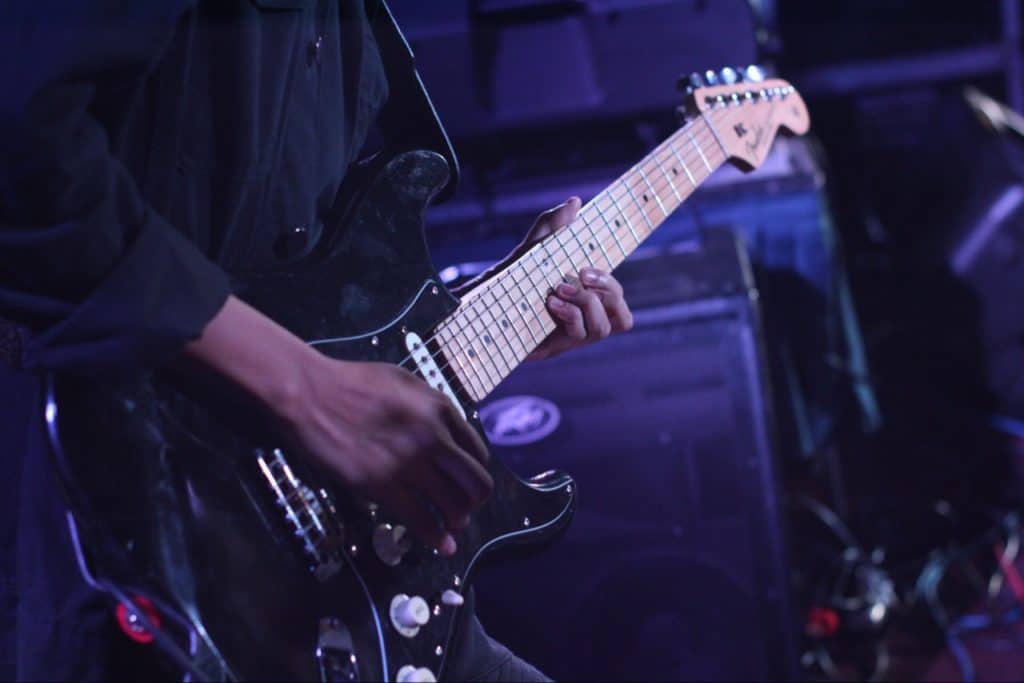
That’s ALL I want you to do. Play them in ANY order. Moving around from the 5th fret to the 17th fret to the 10th fret……Or from the open chord area to the 10th fret area to the 5th fret area, to the 17th fret area and on back down to the open chord area, etc. ANY order you want to.
Just keep moving around these areas ONLY, the D chord areas ONLY. Do this for awhile like 10 or 15 minutes, or longer if you’re slow at it, until you get fast at it. You beginners may have to work on this for a couple days, till you get real good at this.
You Will Notice This
When you play the Barre chord, you will notice that there are 3 fret areas when you play them, MEANING they are taking the space of 3 frets every time you play them, per section of the guitar.
Example: When you play a D barre chord, you are with your index finger playing the D fret. And your other fingers, you are playing the D# and the E fret areas ALL at the same time. Your fingers are all touching these areas. They are IN these areas.
The reason I’m emphasizing this is, because I’m trying to get you to notice this, because it is here where the beauty lies. It is here where the magic happens. Where the keys are, that you’ll need to start making some music.

Now I want you to keep moving your FINGERS in these areas ONLY. Play them in any order you want, like, D then E and D# or E then D# and D etc.
Of course you’re going to need to lift your fingers to do this. Just keep moving your fingers around in these areas for awhile till you get used to it for about 5 minutes.
Beginners may want to take way longer till they get used too it. Now after you get good at this, your going to have to add your pinky finger to the mix, to the playing…..
……this is accomplished by moving your pinky back and forth with a relaxed motion, hit or play this ONLY in the F fret area of the guitar on the 3 string and 2nd string and 1st string only.
Playing any of them strings you want, but still keep that D chord shape going with your other fingers also, as well as keep using your pinky finger from time to time.
So use ALL your fingers. Including your pinky finger, playing them all in different orders, but still with the D chord shape. Do all this till you get good at it.
Now We’re Going To Have To Have The Up And Down Effect
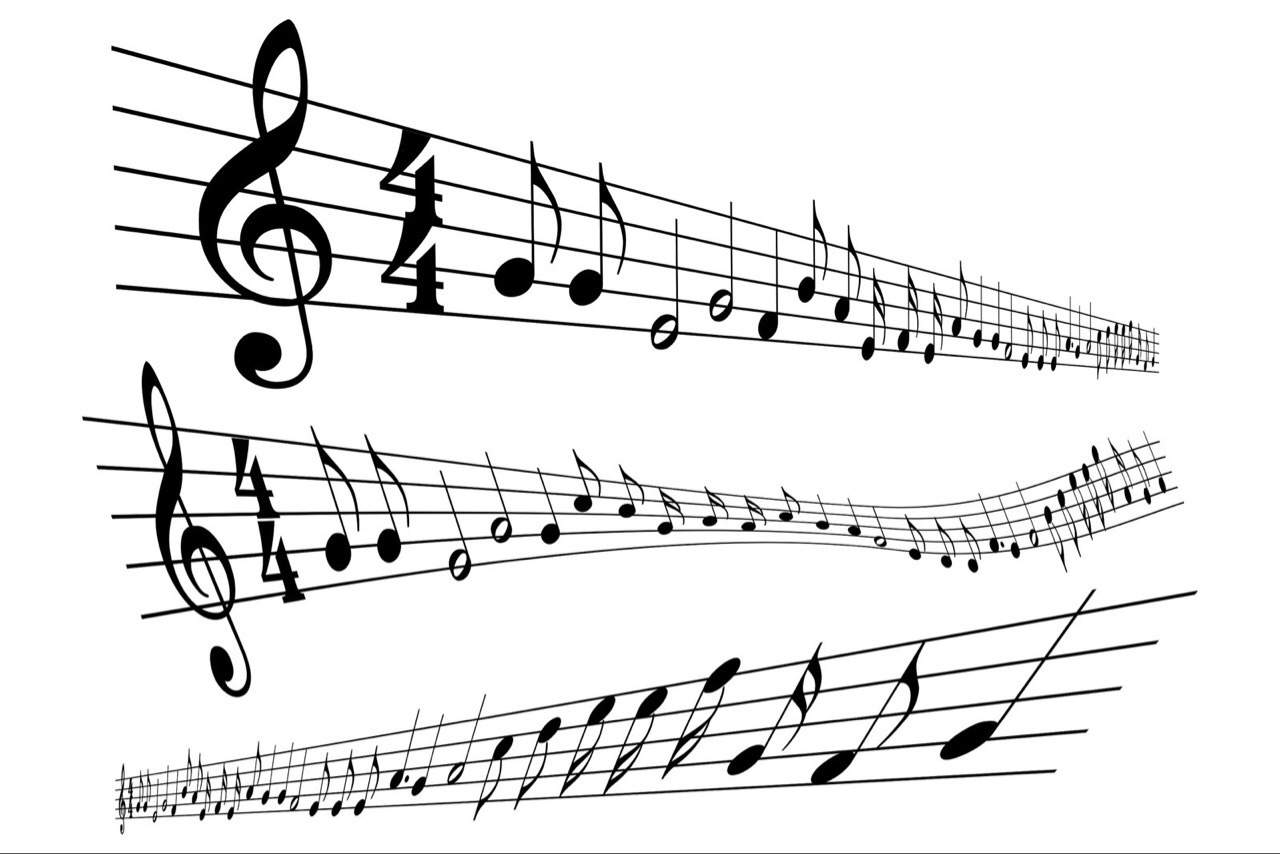
What does music have? It has the up and down effect. What do you mean? Well every time you listen to a song, it is constantly going up and down with pitch, with the keys, with the notes. This is why when you see sheet music, it is all a jumble of notes going up and down on the paper, because it is following along to the music.
NOTE: Every time you go down the guitar you are going to the left of the guitar (fretboard). And every time you go up the guitar you are going to the right of the guitar (fretboard).
Thus this is what you’re going to have to do when you’re playing your guitar. Each and every time you play it you’re going up and down the guitar.
Whether it’s at the bottom of the guitar fretboard or the top of the guitar fretboard. Which I had you do when you played the D chords all over the fretboard (the neck.) And even when I had you move your fingers up and down staying on one D chord, you were STILL GOING UP AND DOWN as you were playing….
Mix them all up…staying on one D chord. And playing different D chords, you were going up and down, which made the guitar sounds. The keys go higher, and lower, thus creating higher melodies and lower melodies.
So when you whistle you’re creating melodies, which go up and down in the sound you’re creating. This is called, THE KEYS , PITCH, AND NOTES. So when you play the guitar, do what you are doing when you’re whistling, go up and down to get your melodies, keys, pitch, and notes. EASY!

So when you play a song on the radio or a song off of YouTube. Or where ever you have your songs. When the song goes up in melody, YOU go up in melody.
And when a song goes down in melody YOU go down in melody. ALL you gotta do, is just follow the highs and lows of the music when you’re playing the guitar, that’s all you have to worry about.
Had to emphasize ALL that, because beginners have a hard time grasping all that.
So bounce around, going from place to place on your guitar BUT only in the D chord areas I told you about.
And ALSO start playing in one spot with a D chord, with your fingers going up and down and also your pinky finger. You MUST practice ALL this to music to get good at this. Don’t worry, just FOLLOW the music, going up and down, high and low. And you’ll do good, um, great!
Make sure no ones around for awhile when you’re practicing this because at first it won’t sound good. The more you practice the better you will get.
Match the music you are playing to the guitar, with ALL the D chords I told you about. It WILL start to match the song you are playing with these chords only.
Just use you’re EARS to tell you where to go, UP or DOWN, HIGH or LOW. YOU WILL find the right areas over time, of where you need to play them on the guitar. THE NOTES GOT TO BE THERE, SOME WHERE, FIND IT.

If the notes not on the 5th fret area, then go to the 10th fret area or the other areas UNTIL you find it.
Missing points and tips:
- In the Open D chord, play around on it’s high and low sounds of it. You will notice the 1st string of it sounds higher than the 2nd string of it. And also the 3rd string too, as you play the single notes within the chord. So strum the higher parts of the chord, if you want it to sound higher and strum the lower parts of it, if you want it to sound lower. You don’t always have to strum the FULL chord, all the time. You can partially strum it.
- What I just said above, in “Missing points and tips,” can also be applied to the D Barre Chords also. When you strum your chords, it doesn’t ALWAYS have to be a full strum. Strum part of it sometimes. Strumming the higher sounding parts of it or the lower parts of it, depending on what the SONG is doing, imitate that. That is your pattern, you need to follow, which is FOLLOW the song.
This is all for now. I feel if I say more, you will take on to much to soon. So I’ll see you in Part 2. Find it here on my website at https://playguitarbyearanysong.com The Post is titled: “The New Way To Play Guitar By Ear Part 2” Click here to read it. You DON’T, want to miss it, it’s gonna be great! AND you’re going to NEED it, for the FULL puzzle, to all this.
Related Questions
Do you have to work at playing the guitar by ear? Yes you have to work at it. It’s not just going to fall in your lap without some effort or knowledge of how to do it. Those who have learned guitar by ear, have worked at it to have that ability.
Who created the first amplified guitar? George Beauchamp and Adolph Rickenbacker. It was a electric guitar. It was created in 1931. Although they both made it, George Beauchamp was awarded the patent for it. A lot of inventors and guitar makers were working on electric guitars, at the same time.
Photo credits:
Open D chord and 5th fret Barre chord images courtesy of Sluffs. Public domain image: https://creativecommons.org/publicdomain/zero/1.0/
F barre chord real picture image courtesy of Elenaf: https://creativecommons.org/licenses/by-sa/3.0/deed.en
10th fret barre chord and E shape barre chord and real picture of F barre chord images courtesy of Elenaf. Public domain images: https://creativecommons.org/publicdomain/zero/1.0/ Check out Elenaf’s great site by clicking on the link ahead: Attribution: Created with Neck Diagrams editor, http://www.neckdiagrams.com
The Beatles black and white picture photo in public domain from commons.m.wikimedia.org https://creativecommons.org/publicdomain/zero/1.0/
John Mayer the famous guitarist and singer photo courtesy of Julio Enriquez from Denver,CO, USA https://creativecommons.org/licenses/by/2.0/deed.en
